 Free Shipping
 Fast delivery in 48/72 h
 Safe Payments


1)WRITE US
Contact us with a report to our Customer Service.
![]()
2)FREE RETURNS
Pack the product using the original shipping packaging.
![]()
3)RECEIVE THE GOODS
We will send you the replaced item as soon as possible.

Wooden crates are one of our great passions! Creative recycling is increasingly trendy, and if you're trying to learn how to paint fruit crates, well...you've come to the right place!
Our friend Stefania "Fania_Heartmade" Martini has written this very useful guide to transform simple fruit boxes into small shabby chic recycling masterpieces! The decorated wooden boxes are a passepartout that you can use throughout the house, as well as in the garden or on the terrace.
There are many techniques of découpage or bricolage with wooden crates, a world of possibilities available to everyone. With a little manual skill and imagination you can create original decorations or really special gift ideas. And if you are looking for some more creative ideas, take a look at our guide to furnish your home with wooden boxes: you will find a series of trendy ideas for all budgets to make your nest even more beautiful!
Ah, and don't forget that in our online store you can find a line of wooden boxes to decorate your home with creative do-it-yourself.
But now we leave the word to Stefania and her tutorial to learn how to paint fruit crates!
Today I want to talk to you about an easy and immediate way to paint a wooden box, a very simple technique that really suits everyone!
First start preparing the box you want to paint: you need to smooth the surface you have chosen to make it beautiful smooth and remove any wood imperfections. You can use a little sandpaper and do this by hand, but with a sander you will surely do it faster. Once this is done, you can start painting the surface of the cassette.
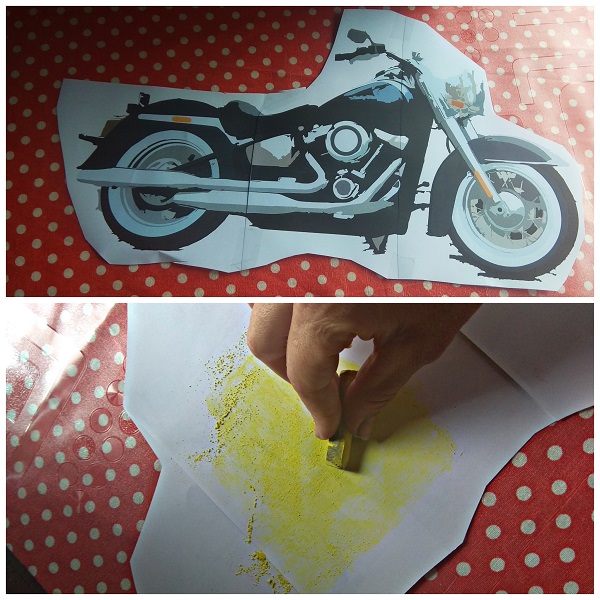
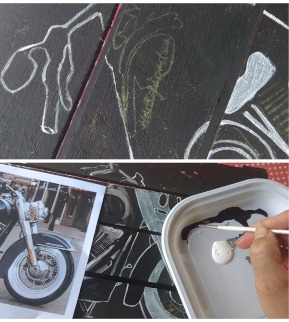
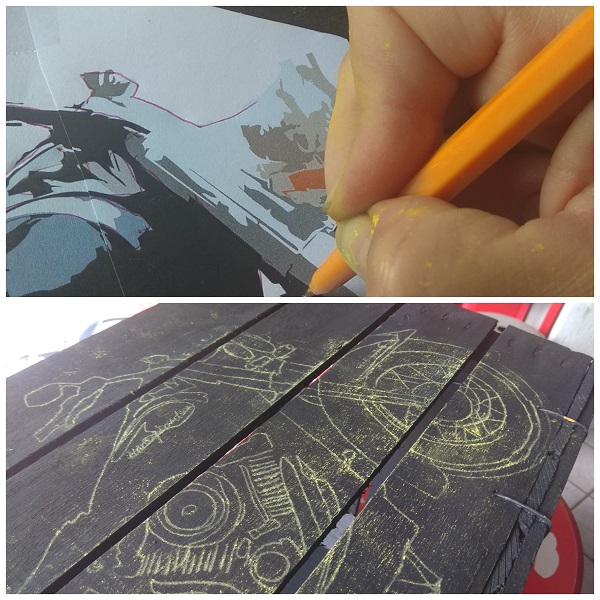
Print the image or design you want to report on the wood (look at the size!) And cut it out. Once this is done, pass a piece of chalk on the back of the sheet to color the entire surface.
Place the sheet on the cassette and carefully retrace the contours of the image with a sharply pointed pen or pencil: the chalk will "transfer" the shape of the image onto the surface of the wood and at the end of the work you will only have to use a damp cloth for erase the signs! Convenient, don't you think?
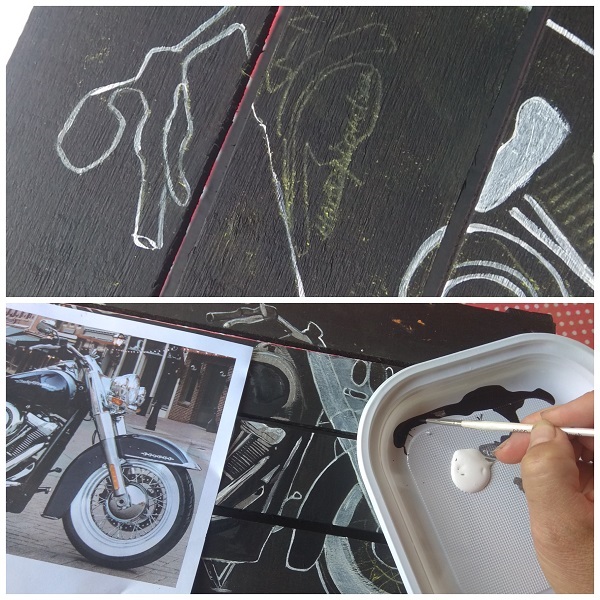
Begin to color the image following the contours defined by the chalk. An advice? Use acrylic colors and carefully choose the brushes, paying attention to the size and shape of the tip.
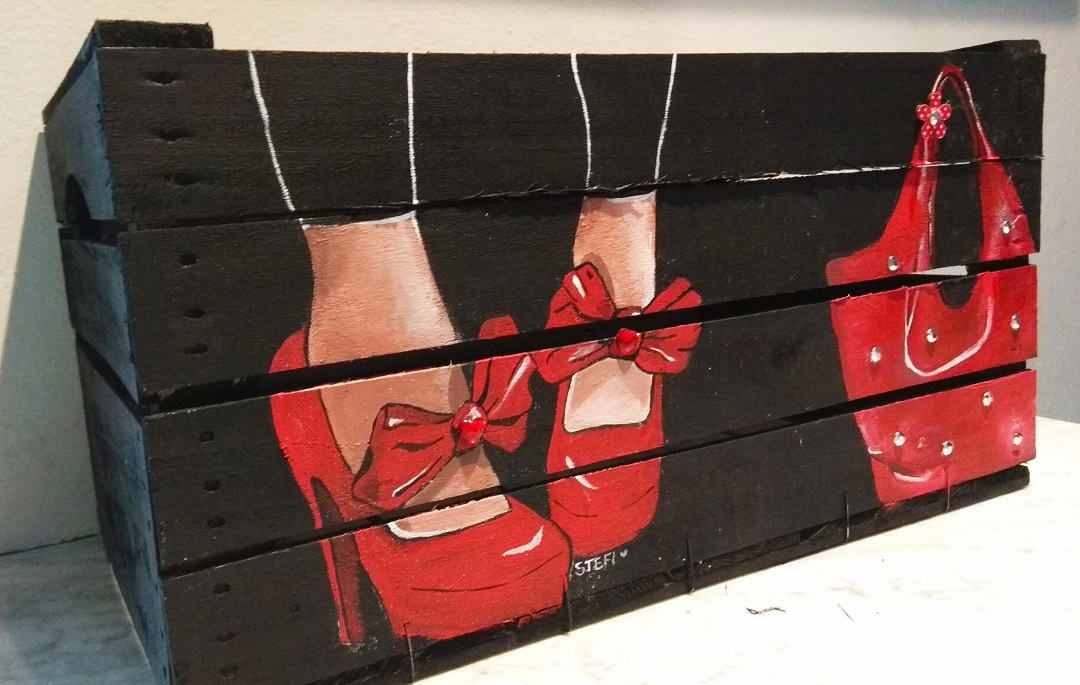
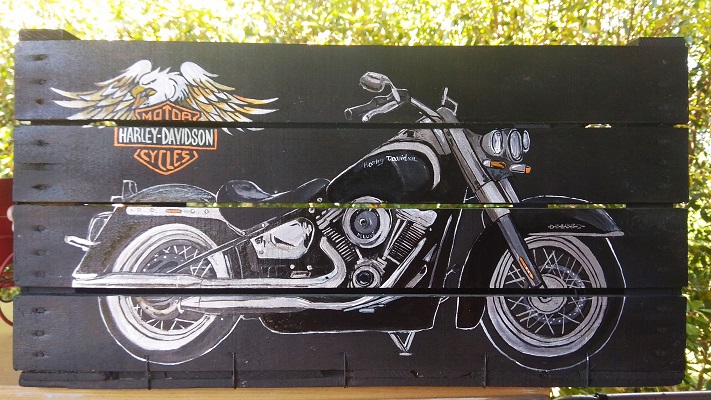
When finished, pass a coat of finishing varnish or vinyl glue to obtain a polishing and protective effect. Et voilà, here's the final result. Your painted fruit box is ready, you can use it as a pretty decoration for the whole house, but it will also be a wonderful gift idea, original and unconventional!
1)WRITE US
Contact us with a report to our Customer Service.
![]()
2)FREE RETURNS
Pack the product using the original shipping packaging.
![]()
3)RECEIVE THE GOODS
We will send you the replaced item as soon as possible.
1)WRITE US
![]()
Contact us with a report to our Customer Service.
2)FREE RETURNS
![]()
Pack the product using the original shipment packaging.
3)RECEIVE THE GOODS
We will send you the replaced item as soon as possible.


Comments (0)